Sorting your digital photos into manageable groups
 Q: I took photos of three different vacations in a row, and I want to import them into my computer.
How do I separate these pictures into three parts so that I can give them each a different label?
A: In a perfect world, we’d dump our camera’s photos into the computer after every photo session, labeling the incoming folder after the event, be it “Sky Diving in Indonesia” or “Backyard Bird Watching.”
Later, when your friends drop by, you can quickly find the right vacation photos.
But in the real world, many photos end up stuffed into a folder named “Stuff.”
How can you quickly isolate three separate trips from one huge pile of file names? Or what if all those sessions are still stored in your camera?
Actually, your camera has made the organization job easier than you may think. Whenever you snap the shutter, your camera invisibly stamps that moment’s time and date onto your photo. When you tell your computer to sort those files by their “Date Taken” times, your photos quickly appear in the order you snapped them.
When viewing your photos in the order you snapped them, you only need a few keystrokes to move each vacation into its own folder. In a nutshell, it takes three steps:
- Sort the photos by chronological order
- View the photos by thumbnail, rather than file name
- Copy each group of photos to its own folder
Tip: These steps work even if you’re looking at a single folder stuffed with vacation photos snapped by different people with different cameras — handy to know if you’ve become the Trip Archivist, who’s now in charge of creating a DVD to mail to everybody you met at the Bird Watching retreat.
Here’s what to do:
Sort the photos by chronological order
First, follow these steps to make your computer sort a folder full of photos into the order they were taken:
- Open the folder containing all your unsorted photos. (If they’re still inside your camera, go ahead and import them all into a single folder.)
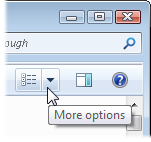
- In the folder’s upper, right corner, click the downward-pointing arrow by the “Change your View” icon shown below.
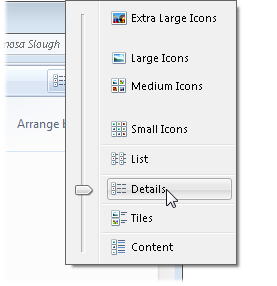
- When the drop-down menu appears, choose Details View, shown below. (That displays the files in columns that list their names, followed by details like file size and creation date.)
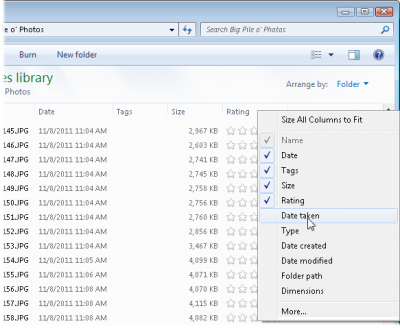
- Right-click the top of an empty column, and when the pop-up menu appears, choose “Date Taken,” shown below. (Don’t see the “Date Taken” option? Click “More…” at the menu’s bottom to see every option; then choose “Date Taken.”)


Following those four steps sorts your photos chronologically, even if you’ve renamed them, or if they’ve been taken by different cameras. (If your photos are showing in reverse chronological order, click the “Date Taken” column header once to toggle them back to normal.)
View thumbnail images of your photos
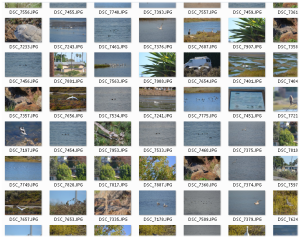
![]() Now that you’ve sorted your photos chronologically, click the View icon (shown in the margin) in the top corner until you can see thumbnails of your folder’s photos. That makes it easier to pinpoint which photos started and ended each trip or photo session.
Now that you’ve sorted your photos chronologically, click the View icon (shown in the margin) in the top corner until you can see thumbnails of your folder’s photos. That makes it easier to pinpoint which photos started and ended each trip or photo session.
Each click of the View icon toggles between icon sizes, but keeps their chronological sort order.
Tip: Photos still not big enough? Click the downward-pointing arrow to the right of the View icon; when the drop-down menu appears, choose Extra Large Icons. That makes the photos about two-inches wide.
Select and move groups of files into their own folders
Now follow these steps to move each group of vacation photos into their own folder.
- Click the first photo in a sequence — for example, the photo that marked the start of your first vacation.
- While holding down your Shift key, click the last photo in the sequence. (Windows quickly highlights those photos, along with every photo in between them.)
- Right-click the selected group of files, and when the pop-up menu appears, choose Cut.
- Create a new folder to receive that group, right-click a blank area inside that folder, and choose Paste from the pop-up menu.
Your computer quickly moves the highlighted photos into your newly created folder. (If your new folder is still misnamed as “New Folder,” rename it with the name of your vacation or photo session: Right-click the folder’s icon, choose “Rename,” and type in the new name.)
Repeat these steps for each group that belongs inside its own folder.
Tip: While you’re at it, take a few seconds to delete the awful photos. It’s the oldest photographer’s trick in the book, making people think you’ve never shot a bad photo.
Posted: November 21st, 2011 under Windows 7.
Tags: digital photos, photography, sort by date taken, sorting folders

