Sharing any Windows Vista folder on your network
 Q: I’ve read the networking chapter in your Windows Vista For Dummies book, and now my Windows Vista computers can share the files in their Public folders. However, I cannot get the Windows Vista computers to share any of their other folders. How do I make this happen?
A: Unlike Windows XP, Windows Vista complicates the sharing of folders on a home network. Windows XP let you share nearly any folder fairly easily. Windows Vista, by contrast, expects people to share only one folder: the Public folder and its contents. (Windows 7’s new Homegroup system simplifies sharing considerably.)
As Microsoft’s designers intended, Vista’s sharing method keeps your files and folders more secure. When you deliberately place something into a folder named Public, you know you’re making it up for grabs.
These restrictions can be too much for small home networks, though, where you want your computers to share nearly everything easily and without restrictions.
To give everybody network access to a particular folder on your Windows Vista computer, follow these steps:
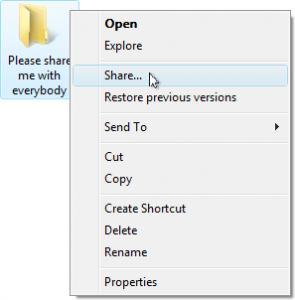
- In Windows Vista, right-click the folder you’d like to share and choose Share. The “Choose People to Share With” window appears.
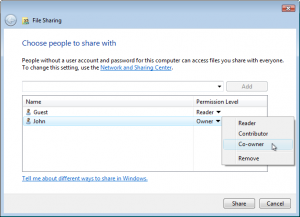
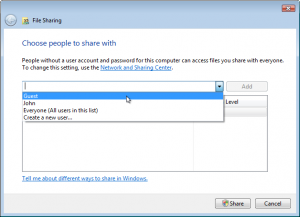
- From the “Add” drop-down list, choose Guest, and then click Add. The word Guest appears in the Name column. Leaving the Permission Level set to “Reader” lets any visitor read or copy the folder’s files, but not change or delete them. Leave the Permission Level set to Reader unless you trust everybody who sits at your computer, even future visitors who may use the computer’s Guest account.
- To let any visitor read, write, change, or delete the material in the shared folder, choose Co-owner from the Permission Level drop-down list.

- Click the Share button to save your changes.
Following these steps gives everybody access not only to that folder, but its contents, including other folders inside it.
Posted: June 1st, 2010 under Networking, Windows Vista.
Tags: co-owner, guest, permission level, sharing folders in Windows Vista


