
Taking screenshots on the Surface RT
 Q: How do I take a screenshot in my Surface RT tablet?
A: Microsoft’s Surface RT tablet comes with a built-in shortcut for taking screenshots — files containing an image of what you currently see on the screen.
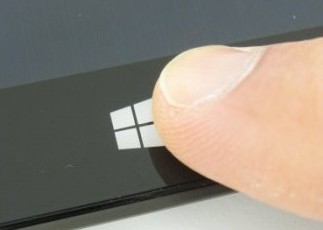
The trick is in how you press the Windows key — the silver Windows logo centered beneath your tablet’s screen.
Each time you press and release the Windows key, three things should happen:
- You should feel a slight vibration
- You should hear a little buzz
- Your Surface RT’s screen should switch to either your Start screen or your last-used application.
If all three things aren’t happening, you won’t be able to take a successful screenshot. Keep tapping the Windows key until it starts making the vibrating buzz as it toggles between the Start screen and your last-used application.
If the Windows key still isn’t working, try removing the snap on keyboard and restarting your tablet. Once the Windows key begins to work, you can snap the keyboard back on.
Once the Windows key begins working the way it should, follow these steps to take a screenshot on your Surface RT:
Taking a screenshot on a Surface RT
- With a finger or thumb, hold down the built-in Windows key, centered beneath your tablet’s screen. (You’ll hear the buzz and feel the slight vibration.)
- While still holding down the Windows key, press the Volume Down switch. (The volume rocker switch is on the Surface RT’s left side.)
The screen will dim slightly, and the Surface RT places a file containing your screenshot in a folder called Screenshots; you’ll find that folder in the My Pictures folder of your Pictures library.
Viewing your screenshots
To open the Screenshots folder and see your screenshots, follow these steps:
- From the Start screen, open the Desktop app.
- Tap the Explorer icon on the desktop’s taskbar. The Explorer program (formerly called File Explorer) appears, listing your four libraries: Documents, Music, Pictures, and Videos.
- Open the Pictures library with a double-tap, and you’ll see the contents of two folders: My Pictures, and Public Pictures.
- Look inside the My Pictures folder for a folder called “Screenshots,” and that’s where your screenshots should be appearing.
Each time you take a screenshot, Windows RT adds a new number to the screenshot’s file name. You’ll see screenshots named Screenshot (01), Screenshot (02), and so on.
The Surface RT’s screenshot feature comes with a few limitations, though: You can’t take a screenshot of your opening screen or your lock screen. Everything else should be fair game, though.
__________________________________________________________________________
 My book, Surface For Dummies, covers both the Surface RT and Surface Pro versions of Microsoft’s Surface tablet.
Pick up a copy on sale at Amazon now!
Posted: April 15th, 2013 under Surface For Dummies, Tablets, Windows RT.
Tags: screenshots, Surface RT